Connecting your Apple and Google accounts
The credentials the platform uses to sign, submit and notify on your behalf, where to generate each one, and the classic mistake behind each. They are stored encrypted and never come back to the screen.
There are four credentials, and they look alike two by two
| Credential | What it does | You need it if |
|---|---|---|
App Store Connect key (.p8 + Key ID + Issuer ID + Team ID) |
signs and submits the build to Apple | you publish on iOS |
Play Console service account (.json) |
submits versions to Google Play | you publish on Android |
Firebase: google-services.json + service account (.json) |
delivers notifications on Android | you use push on Android |
Apple In-App Purchase key (.p8) |
verifies a purchase made inside the app | you sell inside the app on iOS |
Two traps come from that. The Play Console service account is not the Firebase one: one publishes the app,
the other sends notifications, and both are similar-looking .json files. And the In-App Purchase key is not
the App Store Connect key: Apple issues them separately, both are .p8 files with a BEGIN PRIVATE KEY block, and
they are indistinguishable from the outside. That is why the platform checks the purchase key with Apple when
you save it, instead of looking at its shape.
Google Play
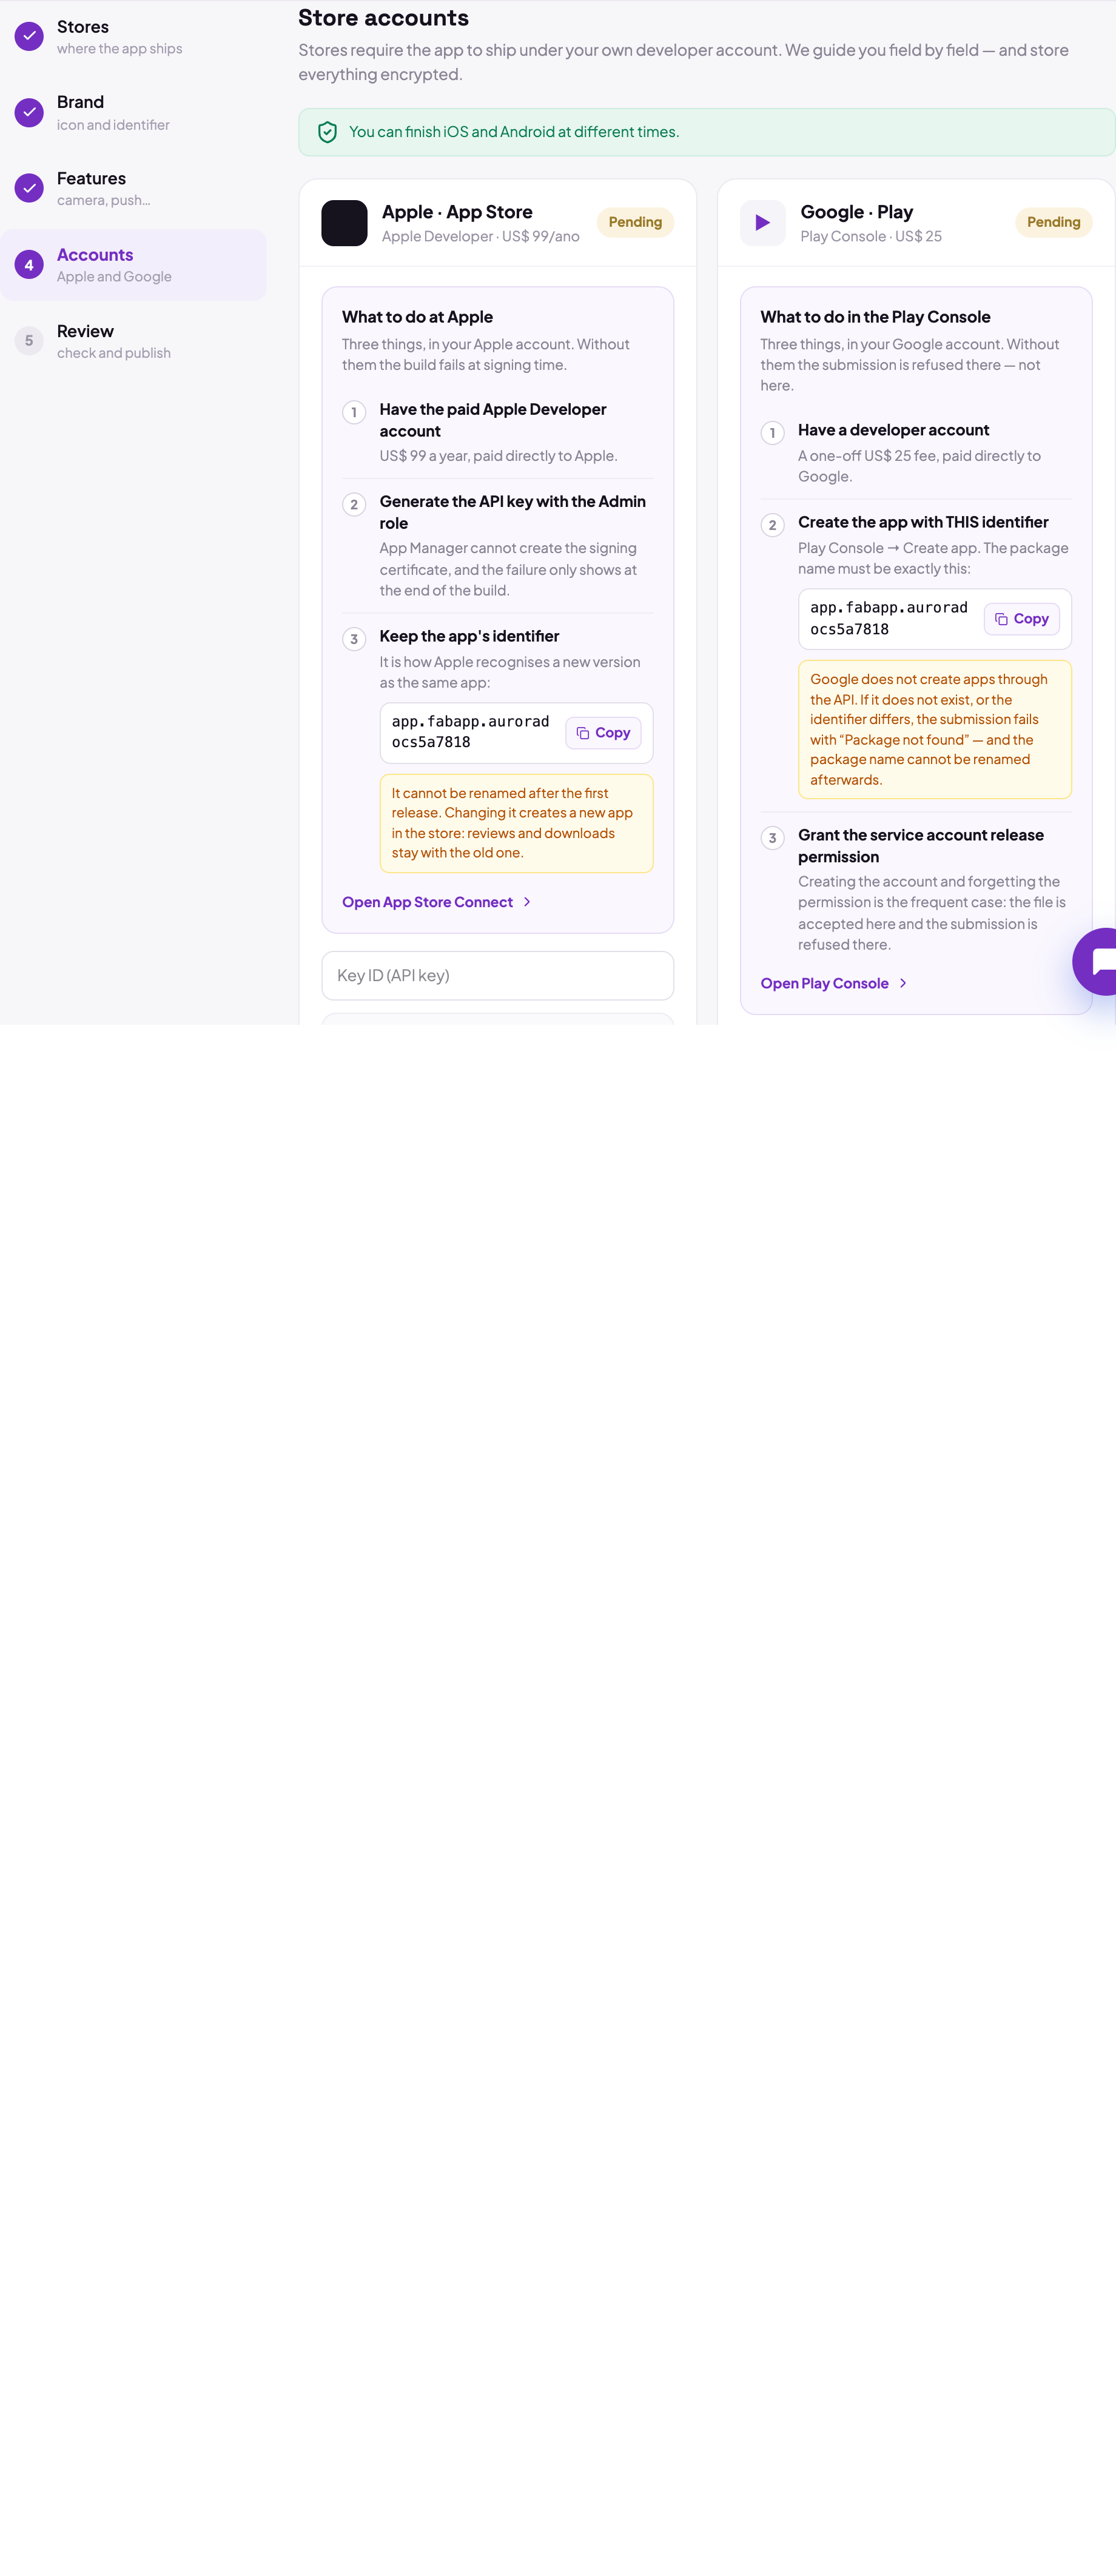
1. Create the app in the console, with the exact identifier
In the Play Console, Create app. The package name has to be exactly the identifier the Mobile app tab shows (there is a copy button next to it).
Google's API does not create the app. If the package is not there, the submission fails with Package not found, and the package name cannot be renamed afterwards.
2. Create the service account
The service account is the robot user that submits versions. It is created in Google Cloud and authorised in the Play Console. Google no longer requires linking the Cloud project to the Play Console to use the API, so the path is direct:
- in the Google Cloud Console, create (or pick) a project;
- enable the Google Play Android Developer API in it;
- under APIs & Services → Credentials → Create credentials → Service account, create the account. No role is needed here: the permission that matters is the Play Console one, in the next step;
- on the account, Keys → Add key → Create new key → JSON. The file downloads immediately, and that is the file you upload to the platform.
Keep that .json like a password: whoever has the file can publish in your Play Console.
3. Grant the permission in the Play Console
This is the most frequently forgotten step, and the symptom misleads: the file is accepted here and the submission is refused there.
In the Play Console, Users and permissions → Invite new user, use the service account's e-mail (something
like name@project.iam.gserviceaccount.com), add the app under the per-app permissions tab and tick:
- Release apps to testing tracks;
- Release to production, exclude devices, and use Play App Signing, if you are going to publish to production.
If your app sells a subscription or a purchase inside it, also tick these two, in the account's permission section (not the per-app one):
- View financial data, orders, and cancellation survey responses;
- Manage orders and subscriptions.
Invite. The service account shows up in the list like any other user.
Publishing and reading purchases are different permissions, and that distinction has already cost a sale. With the first two permissions the service account uploads versions and even creates the catalog products, so everything looks ready. Without the last two, the customer buys normally, the money moves, and Google refuses the purchase check: the platform then refuses to grant access, because granting without confirming would be worse. The symptom is a purchase that completes in the store and unlocks nothing in the app. If you sell inside the app, come back here and check these two before testing.
4. The SHA-256 fingerprint (optional)
It only makes your website's links open inside the app. It is under Setup → App integrity → App signing. Use the one from the app signing key certificate, not the upload key: using the upload key is the classic mistake, the value looks right and link verification never passes.
Apple
1. The App Store Connect key
In App Store Connect, under Users and Access → Integrations → App Store Connect API → Team Keys, click Generate API Key. Name it and pick the role.
The role has to be Admin. App Manager cannot create the signing certificate, and that failure only shows up at the end of the build, after 20 minutes of compiling, in a message about a certificate that does not say "wrong role".
When you generate it, Apple lets you download the .p8 file once. If you lose it there is no recovery: revoke
the key and generate another. From the same screen you get the other two fields: the Key ID (ten characters, on
the key's row) and the Issuer ID (a UUID, written above the list, the same for all your keys).
Swapping Issuer ID for Key ID is the most common mistake, because both come from the same screen.
2. The Team ID
At developer.apple.com → Membership, top right, next to the team name. Ten characters. Without it the build cannot authenticate to sign, and it fails in the cloud with an error about a certificate.
3. Keep the identifier
The same identifier from the Brand step. It is how Apple recognises that a new version is the same app, and it does not change after the first publication.
Android notifications: the two Firebase files
Android delivers notifications through Firebase Cloud Messaging, which requires a Firebase project of your own. Two different files from the same project, and they only work together:
| File | Where it lives | Where to download it |
|---|---|---|
google-services.json |
inside the app, so it knows which project it belongs to | Firebase → Project settings → Your apps → Android |
Service account (.json) |
on our server, to authorise sending | Firebase → Project settings → Service accounts → Generate new private key |
Create the Android app inside the Firebase project with the same identifier as the app. If the two files come from different projects, sending the notification fails with a sender error that does not say so in those words.
iOS does not use Firebase. There, delivery goes through Apple with the credential the platform already creates in your account. Without these two files, push works on the iPhone and not on Android.
The In-App Purchase key
Only needed if you are going to sell a subscription or a purchase inside the app on iOS. Under Users and Access → Integrations → In-App Purchase, click Generate In-App Purchase Key. It also downloads once, and the required role is Account Holder or Admin.
The guide Selling subscriptions inside the app covers the rest of the path.
The screen asks for three things, and all three have to come from the same key:
- the Key ID: the ten characters on the key's row;
- the Issuer ID: the UUID written above the list. It is the same as the App Store Connect key's, because it belongs to your team, not to the key;
- the
.p8file. The In-App Purchase key's file is namedSubscriptionKey_<KeyID>.p8. If yours is namedAuthKey_<KeyID>.p8, it is the App Store Connect key, which Apple does not accept for verifying purchases.
When you save, the platform asks Apple whether the key works, instead of only checking the format, because the two keys have exactly the same shape. You can connect the key before the app's first release, with the version still in review: until the app is released, Apple only answers in its test environment (sandbox), and that is where the key is checked. It is also the path that verifies the Apple reviewer's test purchase.
If you see "a chave da Apple foi recusada" (the Apple key was refused)
The message only appears when Apple refused the key in both environments, production and test. Check in this order:
- Is it the In-App Purchase key? The file name answers it:
SubscriptionKey_…, notAuthKey_…. - Is the Key ID the file's? The ten characters after
SubscriptionKey_must match the Key ID you typed. - Is the key from the app's team? If you can access more than one developer account, generate the key in the account where the app is registered. A key from another team does not work for this app.
- Is the key still active? A key revoked in App Store Connect is refused for good. Generate another.
Fixing only the file and trying again works: the platform reuses nothing from the previous attempt.
What the platform cannot verify for you
Connecting the account is half the work. The other half happens inside the store's console, and from outside there is no way to see whether it was done: whether the app exists in the Play Console, whether the service account got its permission, whether the key has the Admin role.
That is why the screen lists those requirements without blocking the button. It would rather let you try and fail with a clear message than pretend it knows something it does not.